Image resolution is one of those things that trips up a lot of clients when they dive into design or printing projects. Why does your image look blurry when you enlarge it? Why can’t that logo be printed poster-size? The answers all come down to resolution. What is image resolution?
Raster vs. Vector
Raster (or pixel-based) images are made up of tiny dots called pixels. Common file types include JPG, JPEG, PNG, TIFF, BMP, GIF, and RAW. Up close, a raster image looks like a grid of tiny squares; zoom out, and the dots blend together.
When you zoom in, the individual pixels look like this- each square is a pixel.
When you zoom out, the same image looks like this:
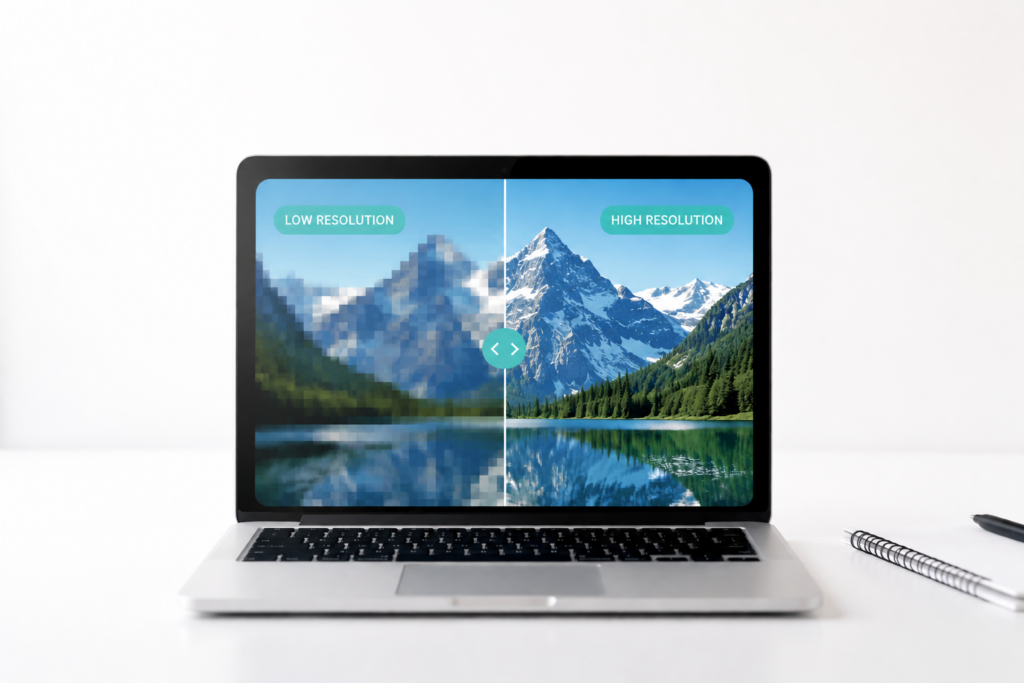
Pixels have a limitation: you can’t make them bigger without losing quality. The larger the pixels get, the blurrier the image becomes. You can always scale down a pixel image, but you can’t scale it up without losing clarity.
Tip: Always keep the largest version of your file. Work from duplicates when editing so you never overwrite the original.
Vector files are great for logos and designs that need to scale, but they aren’t always ideal. For photos or images with lots of detail, raster files like JPG or PNG handle colors and textures better.
DPI and PPI
- For print, aim for at least 300 dpi (dots per inch). Some professional printers may request 350+ dpi.
- For web, 150 dpi is usually sufficient to reduce file size and improve load times. Retina screens can display over 300 ppi, so high-resolution files still look crisp online.
Quick Fix
Having pixel problems? Keep originals, use vector files when possible, and check your DPI/PPI before printing or uploading online.
Need help getting your images print-ready or web-ready? Email us at hello@jackandmo.com for tips, tools, and expert guidance to make your graphics look crisp and professional every time.